

Key Takeaways
Why container gardening works for renters
Renters face a straightforward problem: the ground usually belongs to someone else. Digging beds, installing irrigation, or planting trees can violate a lease and result in losing a security deposit. Container gardening sidesteps that entirely. Everything you grow sits in a vessel you own, and when you move, it all comes with you.
Small yards present a similar constraint. A concrete patio or a narrow side strip may be the only outdoor space a household has. Containers let that space work harder by stacking vertically, grouping near walls, or lining a fence without any permanent change to the property.
There is also a practical upside for beginners. A single container is a manageable experiment. If a crop fails, the loss is small, and the next season you can try something different in the same pot. That flexibility is harder to get from a traditional in-ground bed.
Container growing connects naturally to other low-cost gardening strategies. See our guide to starting seeds on a budget for ways to fill your containers without paying full transplant prices.
Choosing containers without spending much
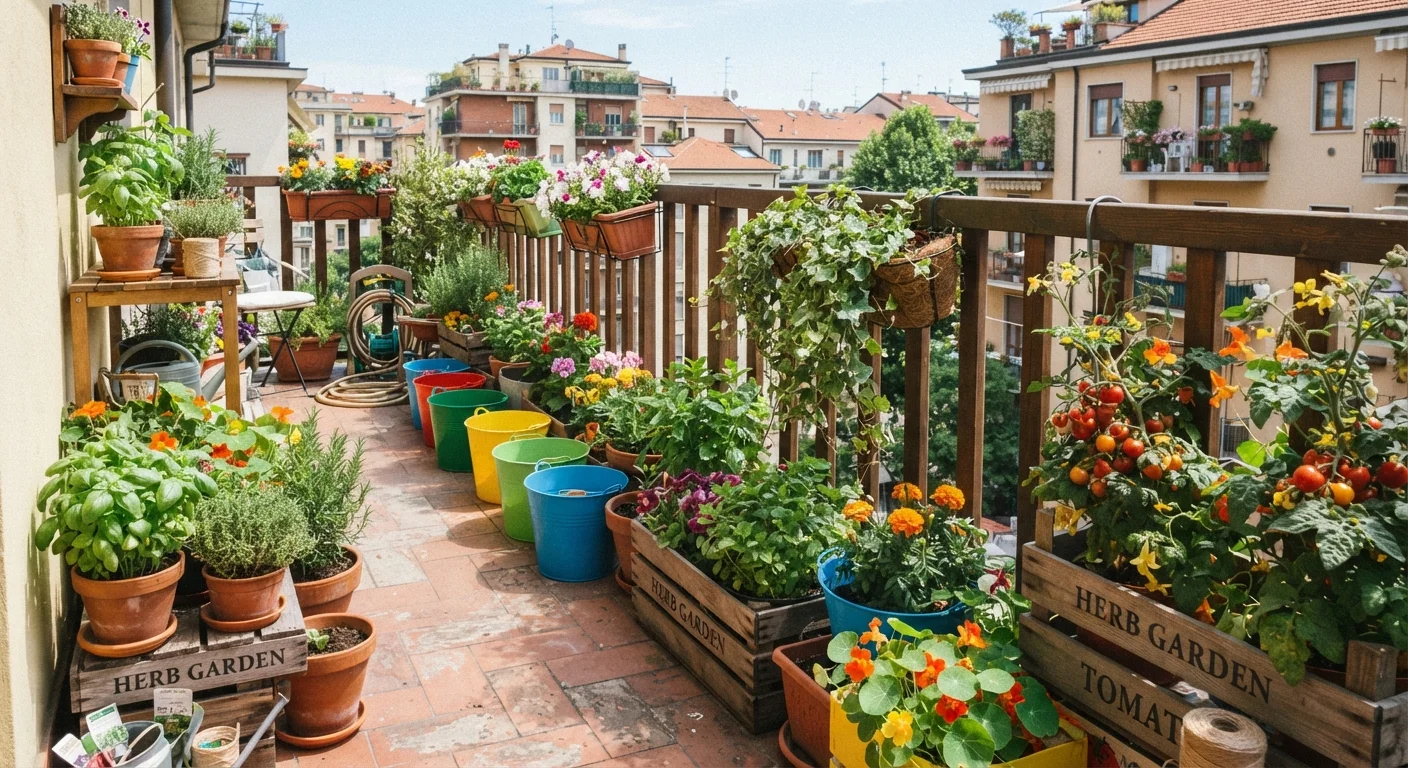
The container market is wide, but most of it is optional. Before buying anything, look around the house. Five-gallon food-grade plastic buckets, wooden crates lined with landscape fabric, large tin cans, and even sturdy cloth laundry bags all function as planters. The main requirements are: enough volume for the root system, at least one drainage hole, and material that will not leach harmful chemicals into edible soil.
For food crops, avoid containers that previously held motor oil, solvents, or other chemicals. Buckets labeled food-safe (often marked with a fork-and-cup symbol) are a reliable choice. For ornamental plants, the material restrictions are looser.
Volume matters more than shape for most vegetables. Tomatoes and peppers need at least five gallons per plant. Lettuces, herbs, and radishes manage in two gallons or less. Depth matters for root vegetables: carrots need at least twelve inches of soil depth to develop properly.
Group containers together on a patio or balcony rather than spacing them out. Clustered pots retain humidity around leaves and reduce the frequency of watering needed on hot days.
Plants lose moisture through their leaves, and neighboring plants create a small buffer of humid air that slows that loss, which matters most during summer heat.
For tall containers, fill the bottom third with upside-down nursery pots or crumpled newspaper before adding potting mix. Most vegetable roots stay in the top twelve to eighteen inches anyway.
This approach reduces the amount of potting mix needed per container, which is often the largest material cost in a container garden setup.
Use saucers under containers on wood or composite decking, but elevate the container slightly on pot feet or small tiles to allow air circulation and prevent rot.
Standing water trapped between a container and a deck surface can damage both the decking material and the container itself over a season.
Drilling drainage holes in solid-bottom containers costs nothing if you already have a drill bit. Space holes about an inch apart across the bottom to prevent waterlogging.
What to grow and where to put it
Sun is the first constraint. Six or more hours of direct sun per day supports tomatoes, peppers, beans, and most herbs. Spaces with three to five hours of sun are better suited to lettuce, spinach, kale, parsley, and cilantro. Below three hours, most food crops struggle, though some shade-tolerant ornamentals will do fine.
For a first container garden focused on food, compact varieties outperform standard ones. Dwarf or patio tomatoes, bush beans, and container cucumber varieties produce reliably without needing staking systems that can become unwieldy on a small balcony. Herbs such as basil, chives, and mint grow quickly and are used frequently enough to justify the space.
Mint spreads aggressively in the ground, but in a container that behavior becomes an asset: one pot stays contained and produces a steady harvest all season.
Flowers are worth including even in food-focused setups. Marigolds planted near vegetables can deter certain common pests, and nasturtiums are both edible and visually appealing. If you eventually want to move beyond annuals, our article on low-maintenance perennials covers which species work with minimal ongoing cost.
Soil, drainage, and watering basics
Garden soil from the ground should not go into containers. It compacts in a pot, restricts root growth, and drains poorly. Use a potting mix formulated for containers. Many include perlite or vermiculite (lightweight materials that improve drainage and aeration), which matter when a container cannot drain the way in-ground soil does.
To stretch a bag of potting mix, partially fill large containers with a layer of crumpled newspaper or empty plastic bottles before adding soil. Roots do not need the full depth of a tall planter, so this reduces how much mix you need without compromising plant health.
Containers dry out faster than garden beds, particularly in summer heat or on reflective surfaces like concrete. A quick finger test works well: push a finger an inch into the soil and water if it feels dry at that depth. Consistent moisture, rather than occasional heavy watering, produces better results for most vegetables.
Watch for weight on balconies and decks
Wet soil is heavy. A standard five-gallon container filled with saturated potting mix can weigh forty pounds or more. Before loading a balcony or elevated deck with containers, check your building's load limits with your landlord or building manager. Distribute weight near structural supports rather than near railings. Lightweight potting mixes (those containing significant perlite or coir) help reduce the load.
Keeping costs down over time
The largest recurring cost in container gardening is replacing soil and buying new plants each season. Both are avoidable with a little planning.
Potting mix can be refreshed rather than fully replaced. At the start of each new season, remove old root matter, mix in a small amount of compost, and top off the container. A full replacement is generally only necessary if the previous crop suffered from disease.
Seeds cost a fraction of transplants and produce the same plants. Packets often contain far more seeds than one household can use in a season. Splitting a packet with a neighbor or another gardening household reduces cost further. Our seed starting guide covers how to get seeds going indoors without dedicated equipment.
At the end of the season, save seeds from non-hybrid (open-pollinated or heirloom) varieties. Tomatoes, peppers, beans, and many herbs produce seeds that grow true the following year, which eliminates that purchase entirely.
Growing food in containers also connects back to grocery spending. Fresh herbs and cut-and-come-again greens reduce how often you buy those items. See our healthy eating resources for ideas on working homegrown produce into everyday meals.
Common mistakes and how to avoid them
Overcrowding is the most frequent problem in small-space container gardens. Fitting three tomato plants into one five-gallon bucket looks efficient but results in poor yields and more disease pressure. Follow the minimum spacing recommendations on seed packets or transplant tags, even when space feels scarce.
Under-watering and over-watering both cause similar symptoms: wilting, yellowing leaves, and poor fruit set. The finger-depth test described in the soil section is more reliable than a fixed watering schedule, since conditions vary by season and container material.
Skipping fertilizer is another common gap. Potting mix nutrients deplete over a growing season, particularly with frequent watering. A balanced, water-soluble fertilizer applied every two to three weeks keeps container plants producing. Compost tea (water steeped with compost for 24 to 48 hours and then strained) is a lower-cost alternative that many gardeners use successfully.
Finally, placing containers in spots that are convenient but wrong for the plant leads to poor results. Check the actual sun hours a spot receives before committing to it for a season. Move containers through trial positions over a week before planting if you are unsure about a location.